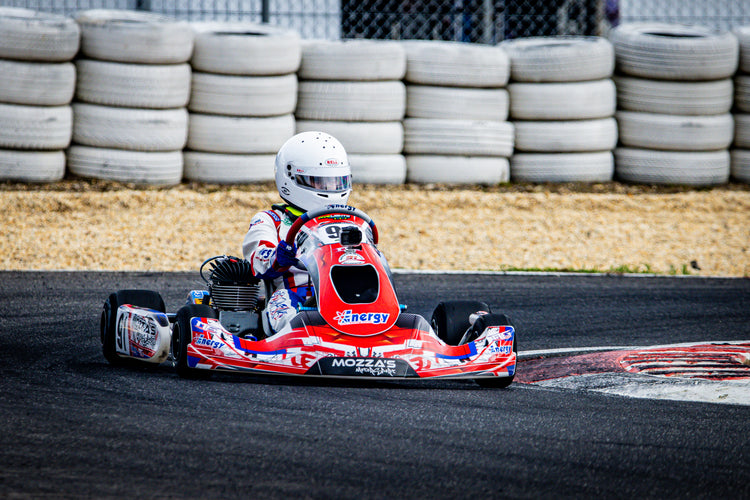

7 Mistakes You're Making with Kart Racing Decals (and How to Fix Them)
Let’s be real: nothing beats the feeling of rolling your kart out of the trailer with a fresh, vibrant set of graphics. It’s that "new suit" feeling but for your machine. It boosts your confidence on the grid and tells your competitors you’re here to win. However, we’ve all seen it: the bubbly stickers, the peeling corners, or the color schemes that look like a bowl of alphabet soup.
Getting your kart racing decals right isn’t just about looking fast; it’s about professional branding and ensuring your sponsors get the visibility they deserve. At Five Lights Graphic & Design, we live for the details that make a kart stand out. Whether you’re a weekend warrior or a national contender, avoiding these seven common pitfalls will elevate your kart's aesthetic from "amateur hour" to "pro-podium."
1. The "Quick Wipe" Surface Prep Fail
The biggest mistake happens before the sticker even touches the plastic. Many racers give their pods a quick wipe with a damp rag and call it a day. If there is a single microscopic layer of chain lube, tyre rubber, or polish left on that plastic, your custom go kart stickers are going to peel faster than a soft-compound tyre on a hot day.
How to Fix It: You need a clinical level of clean. Use a dedicated wax and grease remover or high-percentage Isopropyl Alcohol.
- 🧽 Deep Cleansing: Scrub the surface until the cloth comes away completely white.
- 🛡️ Shield the Bond: Avoid using household cleaners that contain oils or "citrus" scents, as these leave a residue that kills adhesive.
- ✨ Full-Color Brilliance: A clean surface ensures the adhesive bites hard, keeping those colors looking sharp for the whole season.

2. Falling for the "Wet Method" Trap
If you’ve wrapped a car or put decals on a flat trailer, you probably used a spray bottle with soapy water. It’s a great technique for flat glass, but it’s a disaster for the compound curves of a modern kart. Kart plastics are oily by nature, and adding water creates a barrier that prevents the glue from "wetting out" into the pores of the plastic. This leads to edge lifting and those dreaded "fingers" of air at the edges.
How to Fix It: Go dry or go home! Modern kart sticker design uses high-tack vinyl designed for dry application.
- 🎯 Direct Contact: Apply the decal dry to allow the adhesive to grab immediately.
- 🔥 Heat Activation: Use a heat gun (on low!) to make the vinyl supple, allowing it to conform to the curves of the nose cone without needing water to slide it around.
- 📏 Tailored Tension: By applying dry, you can control the tension of the vinyl, ensuring it doesn't overstretch and shrink back later.
Check out our best sellers to see how professional-grade vinyl is supposed to look when applied correctly.
3. Going in Blind Without Pre-Positioning
We’ve all been there: you’re excited, you peel the backing off a massive side pod graphic, and halfway through, you realize it’s crooked. Once that high-tack adhesive touches the plastic, moving it is a nightmare and risks stretching the material.
How to Fix It: Enter the "Hinge Method." Use masking tape to "mock up" your entire karting sticker kit before you peel a single backing sheet.
- 📍 Bespoke Alignment: Tape the decal in place exactly where you want it.
- 📐 Precision Placement: Step back 5 meters and check the lines. Do the stripes on the nose match the side pods?
- 🏎️ The Hinge: Tape down the center, peel back one half, cut the backing paper, and squeegee it down. Then do the other side. This ensures maximum visibility and perfect symmetry every time!
4. Design Overload & Poor Color Contrast
You want your name, your sponsors, your lucky number, and a cool pattern. But if you choose a dark navy background with black text, nobody: not the spectators, not the commentators, and definitely not the photographers: will see your brand. A common mistake in kart sticker design is choosing colors that look great on a computer screen but "muddy out" at 100km/h.
How to Fix It: Think about "The 50-Foot Rule." If you can't read the number from 50 feet away, it’s a fail.
- 🌈 Vibrant Contrast: Use high-contrast pairings like Fluoro Yellow on Navy, or White on Red.
- 🌟 Unveil Your Identity: Ensure your racing number is the hero of the design. Use a bold, clean font that doesn't get lost in the graphics.
- 🎨 Exclusive Aesthetics: Stick to a 3-color palette for the main design to keep it looking clean and professional.

5. Ignoring the "Heat and Squeegee" Finish
Many people think once the sticker is down, the job is done. Wrong! If you don't "set" the adhesive, the first time your kart sits in the sun or gets hit by a pressure washer, those edges are going to curl up like a stale sandwich.
How to Fix It: Post-heating is the secret of the pros.
- 🚀 Boost Longevity: After application, run your heat gun over the entire graphic, focusing specifically on the edges.
- 🧤 Firm Pressure: Use a felt-tipped squeegee or a soft cloth to firmly press down the warm vinyl. This "locks" the adhesive into the plastic.
- 🛑 Safety Check: Be careful not to overheat: you want it warm to the touch, not melting!
6. Sizing Snafus (Measuring Once, Crying Twice)
Not all kart bodies are created equal. An OTK nose cone is different from an EVO or a KG bodywork set. Ordering generic custom go kart stickers without checking your specific bodywork model is a recipe for overhangs, unsightly gaps, and a messy finish.
How to Fix It: Know your plastic!
- 📐 Personalised Fit: Before ordering, identify your bodywork model (e.g., NA3, M7, 506).
- ✂️ Tailored To You: If you're unsure, contact us with a photo of your kart. We can help ensure your kart racing decals are a perfect 1:1 fit.
- 🏁 Take the Lead: A perfectly sized kit looks like it was painted on, giving you that factory-team look that commands respect in the pits.

7. The "One and Done" Mentality (No Backups)
Racing is a contact sport. Your side pods are going to get rubbed, your nose cone is going to take a hit, and your stickers will get damaged. One of the biggest mistakes racers make is only ordering one set and then looking like a "basket case" for the rest of the season after a minor Round 1 scuffle.
How to Fix It: Always have a "Crash Kit" ready.
- 📦 Safeguard Your Image: When ordering your main kit, grab a couple of spare front fairing or side pod stickers.
- 🛡️ Protect the Sponsors: If you lose a pod in a heat, you can have a fresh one stickered up and ready for the final.
- ✨ Stay Fresh: Keeping your kart looking mint, even after a rough weekend, shows sponsors and teams that you take your "performance" persona seriously. While stocks last, it’s always cheaper to bundle your spares with your main order!
Elevate Your Track Presence Today!
Your kart is a rolling billboard for your talent and your brand. Avoiding these common mistakes: like poor prep and bad contrast: will ensure your custom go kart stickers stay stuck and look stunning from the first green flag to the final checkered one.
At Five Lights Graphic & Design, we’re racers too. We know the grit and the glory, and we know exactly what it takes to make a kart look world-class. If you’re ready to transform your look and unveil a design that truly represents your speed, we’re here to help.
Ready to start your next project?
- Explore our Karting Stickers Collection
- Check out our Evo Kart Australia range
- Need something totally bespoke? Get in touch with Dylan today!
Don't let a bad sticker job hold back your brand. Let’s get you looking as fast as you drive!